所有動態
- 前幾天
-
 zhang941123註冊了
 -
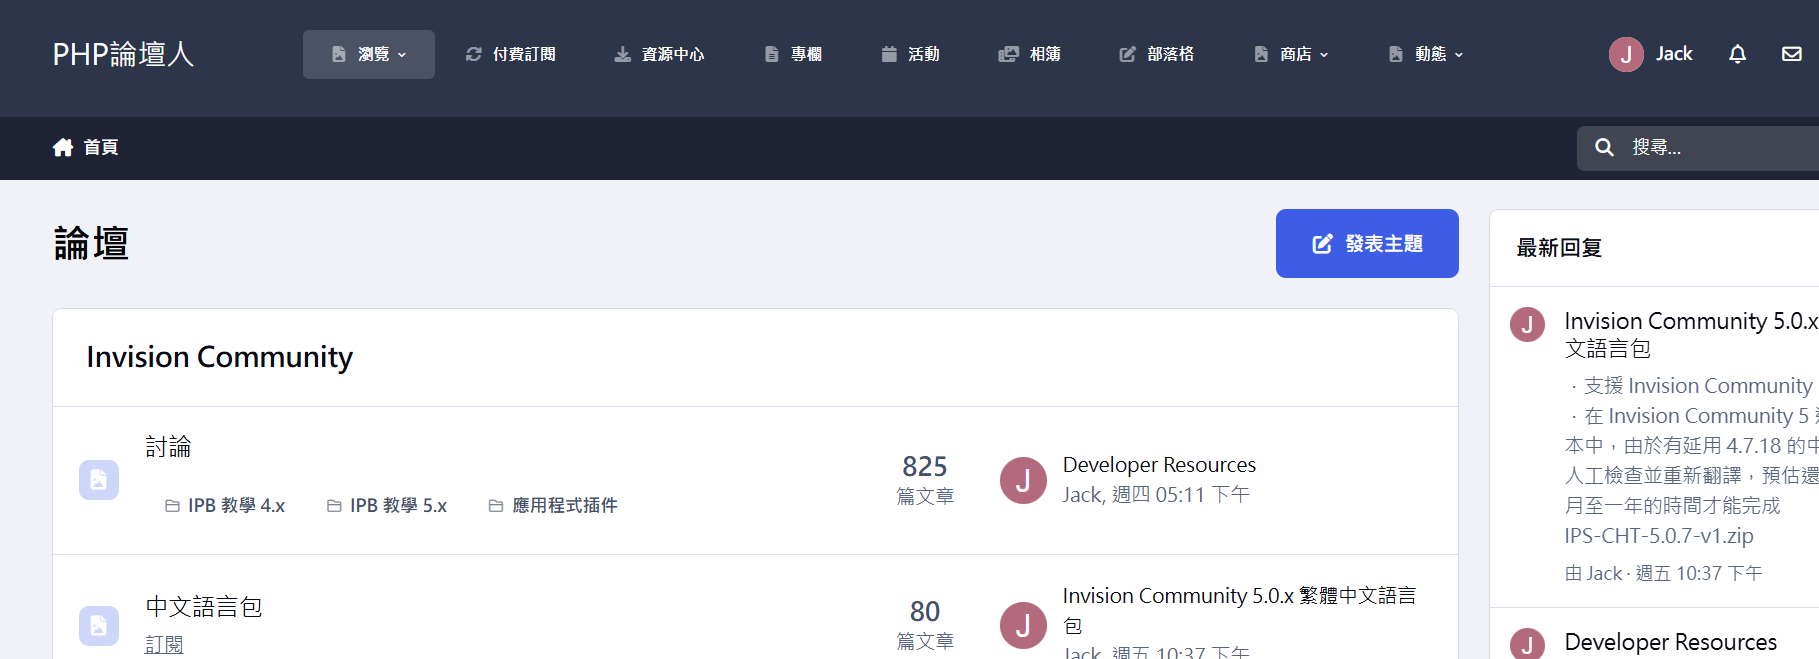
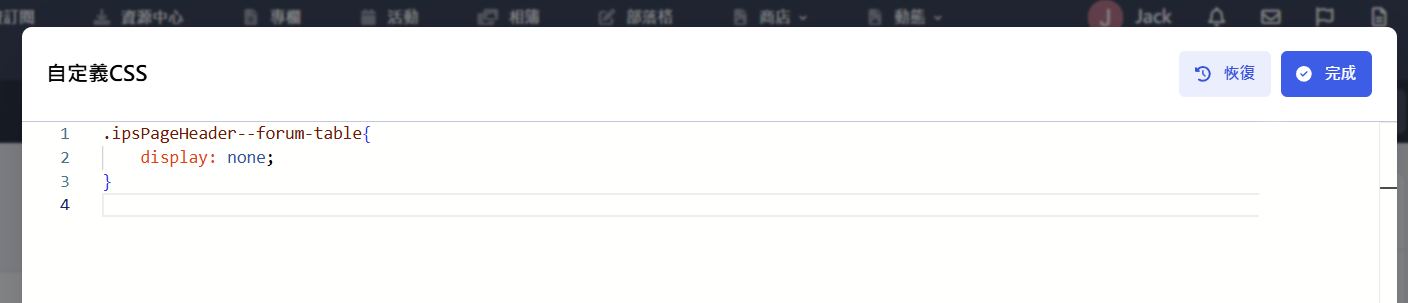
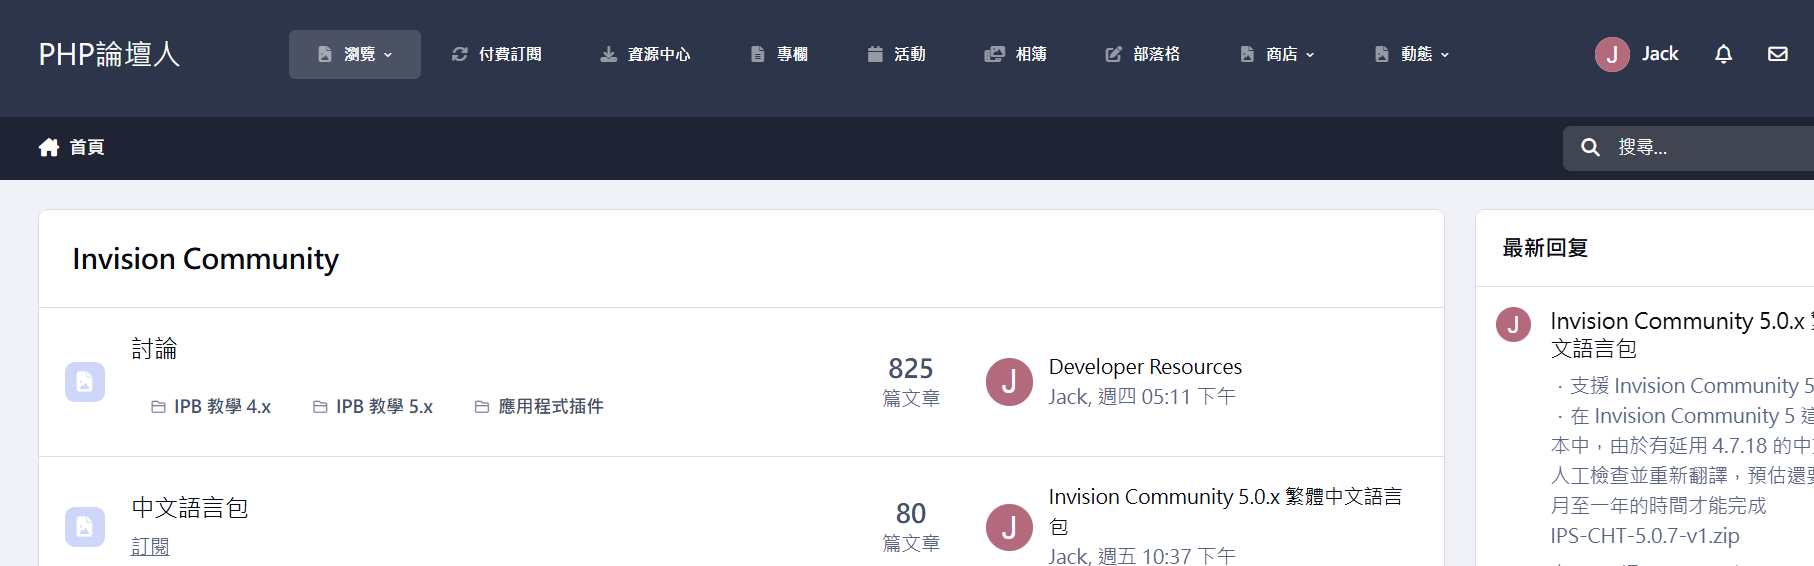
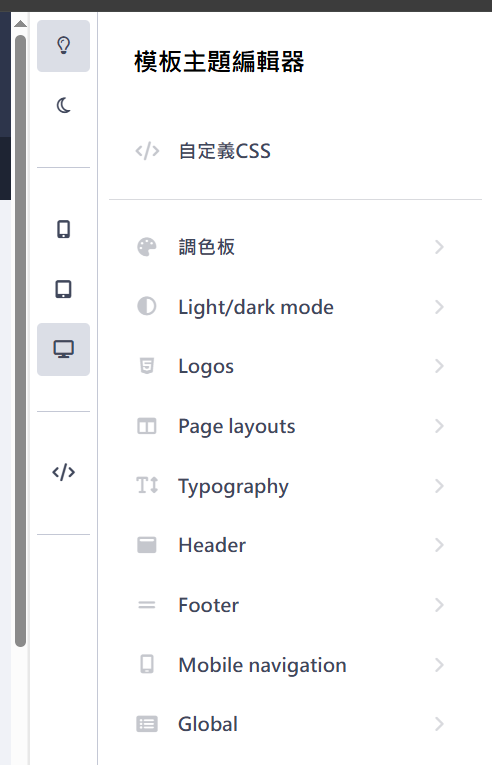
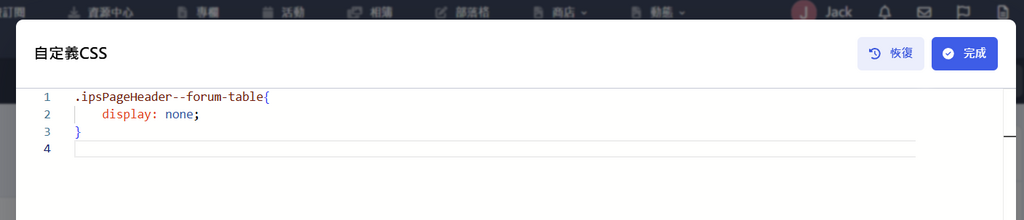
 刪除首頁的「發表主題」/ 「发帖」按鈕 for IPS 5.0 IPS 5.0.x 修改的方式不同於IPS 4.7.x 點擊上方的用戶名 -> 模板主題編輯器 -> 自定義CSS -> 將以下代碼,複製貼上 .ipsPageHeader--forum-table{ display: none; }-> 完成 -> 儲存設定 -> 關閉編輯器 如果在其他視圖,也想刪除這個按鈕,應該不是這個名稱,需要再找找
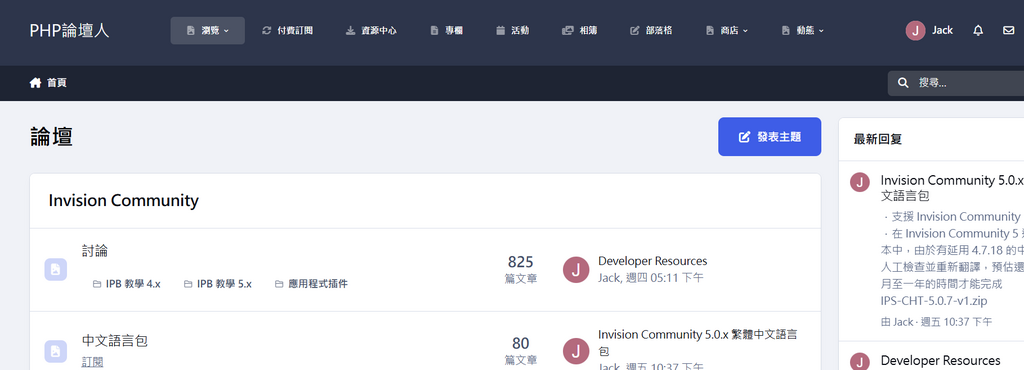

- 之前的
-
.支援 Invision Community 5.0.7 .在 Invision Community 5 這個大版本中,由於有延用 4.7.18 的中文包,我人工檢查並重新翻譯,預估還要花數個月至一年的時間才能完成 IPS-CHT-5.0.7-v1.zip
-
Invision Community Developer Resources https://invisioncommunity.com/developers/
-
.支持 Invision Community 5.0.7 .在 Invision Community 5 这个大版本中,由于有延用 4.7.18 的中文包,我人工检查并重新翻译,预估还要花数个月至一年的时间才能完成 IPS-CHS-5.0.7-v1.zip
-
.支援 Invision Community 5.0.6 .在 Invision Community 5 這個大版本中,由於有延用 4.7.18 的中文包,我人工檢查並重新翻譯,預估還要花數個月至一年的時間才能完成 IPS-CHT-5.0.6-v1.zip
-
.支持 Invision Community 5.0.6 .在 Invision Community 5 这个大版本中,由于有延用 4.7.18 的中文包,我人工检查并重新翻译,预估还要花数个月至一年的时间才能完成 IPS-CHS-5.0.6-v1.zip
-
 y576399註冊了
 -
Invision Community 5.0.x 論壇升級 ------------------------------------ 暫時關閉論壇 ------------------------------------ 論壇後端 -> 系統 -> 一般配置 -> 關閉或開啟論壇 -> X 關閉的原因 -> 可以寫些原因 儲存 -> ----------------------------------- 下載IPS最新版本 ----------------------------------- 建議在Windows就先解壓縮,雖然論壇升級是直接覆蓋檔案後升級,但可以先刪除不必要的檔案 然後壓縮為 ips.zip ------------------------------------ 先備份資料庫、網站目錄 ------------------------------------ 先備份一次資料庫、Web目錄 注意:先將今日的自動備份檔,改個檔名,再下備份指令 (不然檔名會重覆) 指令 bash /root/backup.sh ------------------------- 上傳到論壇根目錄 ------------------------- 停止Nginx /etc/init.d/nginx stop SFTP上傳 最新版本的 ips.zip 到論壇根目錄 /var/www/域名.com cd /var/www/域名.com 解壓縮,直接覆蓋檔案 unzip -o ips.zip 然後刪除ips.zip rm ips.zip ----------------------------------------------------------------------- 更改網站目錄與檔案的擁有人/群組,修改為 www-data www-data ----------------------------------------------------------------------- chown -R www-data:www-data /var/www/域名.com cd /var/www/域名.com 可看到已改為 www-data www-data ls -l ------------------------------------ Crontab 定時運行任務 ------------------------------------ 將IPS論壇的 task.php 權限修改為755 chmod 0755 /var/www/域名.com/applications/core/interface/task/task.php ------------------- 啟動nginx ------------------- 啟動 /etc/init.d/nginx start ------------------------ 升級IPS論壇 ------------------------ 瀏覽器進論壇 https://域名.com/admin/upgrade/ ------------------------ 開啟論壇 ------------------------ 論壇後端 -> 系統 -> 一般配置 -> 關閉或開啟論壇 -> v (是) -> 儲存 論壇後端 -> 系統 -> 獲得支援 -> 清除系統快取 在 [獲得支援] 這裡,有些錯誤會提示你需要解決 ------------------------ 更新中文語言包 ------------------------ 如果有新版本的IPS中文包,則需要更新(覆蓋) ------------------------ 重建網站地圖 ------------------------ 論壇後端 -> 系統 -> 搜尋引擎最佳化 -> 右上方的 重建網站地圖 ------------------------ 重建搜尋索引 ------------------------ 論壇後端 -> 系統 -> 搜尋 -> 右上方的 重建搜尋索引 -> 同意
-
.支援 Invision Community 5.0.5 .在 Invision Community 5 這個大版本中,由於有延用 4.7.18 的中文包,我人工檢查並重新翻譯,預估還要花數個月至一年的時間才能完成 IPS-CHT-5.0.5-v1.zip
-
.支持 Invision Community 5.0.5 .在 Invision Community 5 这个大版本中,由于有延用 4.7.18 的中文包,我人工检查并重新翻译,预估还要花数个月至一年的时间才能完成 IPS-CHS-5.0.5-v1.zip
-
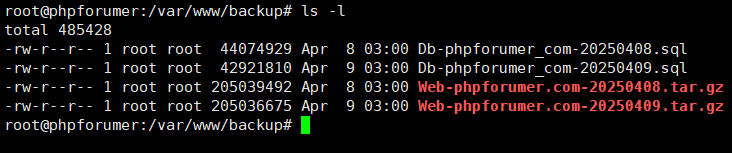
前面的步驟,使用 backup.sh 腳本自動做每日備份 每天早上3點執行備份 (或SSH敲crontab -e指定每天備份的時間) 分別為 Db 資料庫備份檔 與 Web 網站備份檔 備份檔存放目錄 /var/www/backup/ 只保留3天內的備份檔,超過3天將自動刪除 (或開啟 backup.sh 搜尋 3day 來增加天數) 需要自己手動將備份檔移動到異地,做手動的異地備份 或網上尋找 Google Drive 同步腳本、OneDrive 同步腳本,來自動做異地備份
-
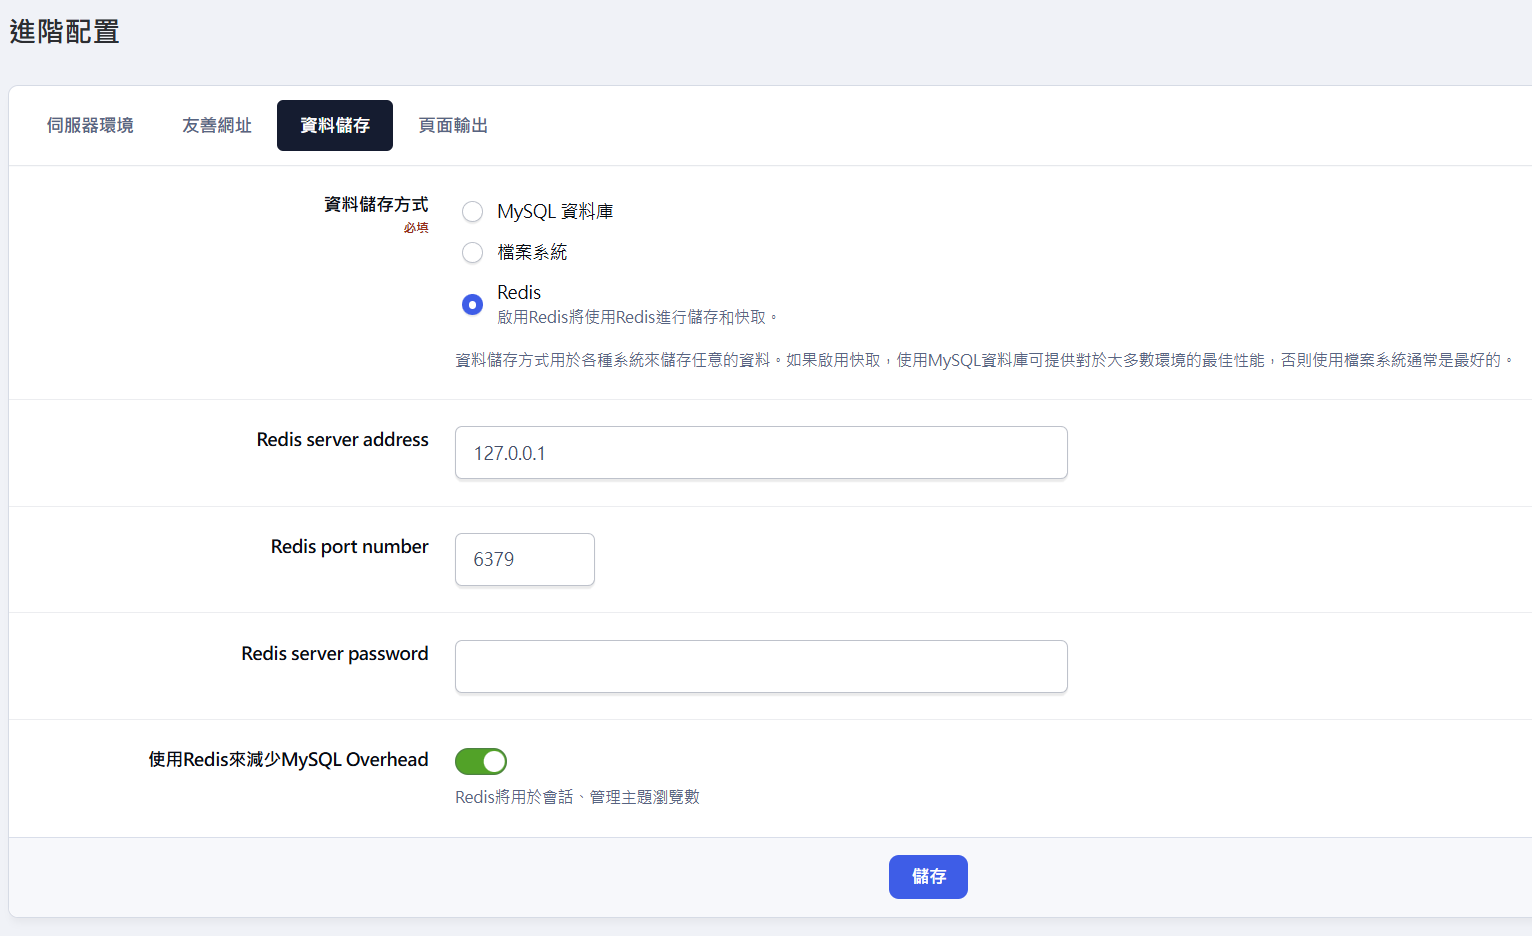
到IPS論壇後端設置Redis,加速論壇的速度 --------------------------------------------- 到IPS論壇後端設置Redis,加速論壇的速度 --------------------------------------------- 简体教程 https://phpforumer.com/topic/528/ 繁體教學 https://phpforumer.com/topic/527/ 論壇後端 -> 系統 -> 進階配置 -> 資料儲存 -> 資料儲存方式 -> Redis 啟用Redis將使用Redis進行儲存和快取。 資料儲存方式用於各種系統來儲存任意的資料。如果啟用快取,使用MySQL資料庫可提供對於大多數環境的最佳性能,否則使用檔案系統通常是最好的。 Redis server address -> 127.0.0.1 Redis port number -> 6379 使用Redis來減少MySQL Overhead -> v Redis將用於會話、管理主題瀏覽數 -> 儲存

-
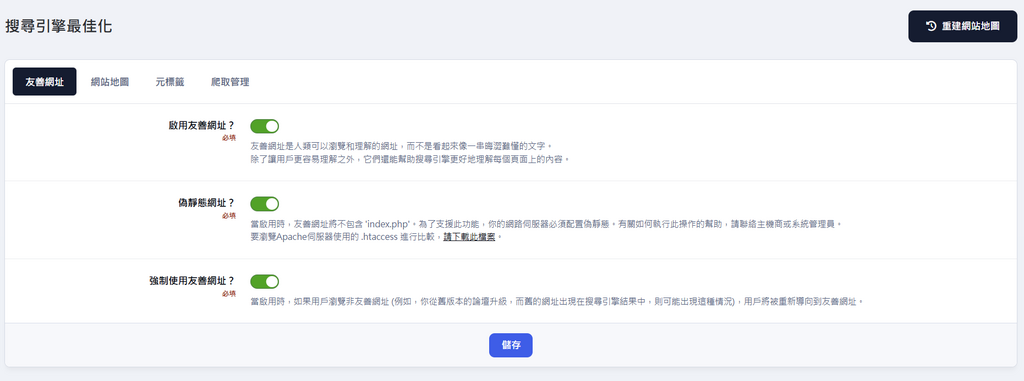
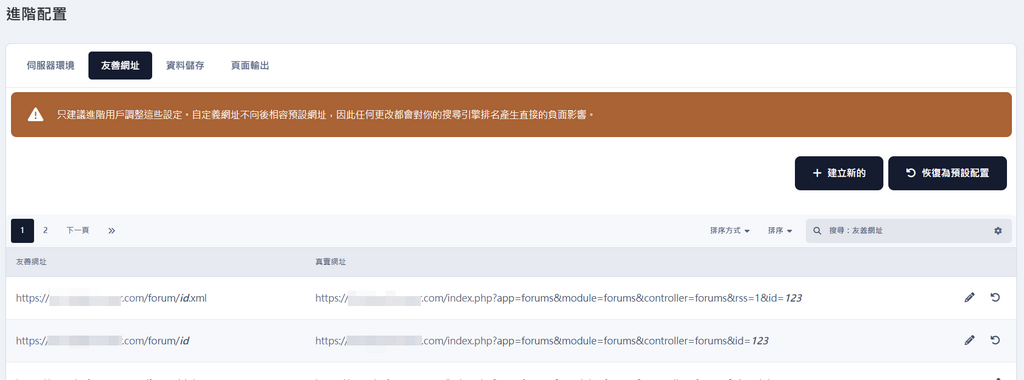
前面步驟 /etc/nginx/rewrite/ips.conf 完成後,還需要到論壇後端設置 ---------------------------------------------------------- 到IPS論壇後端,設置偽靜態,才能修改網址的顯示方式 ---------------------------------------------------------- 简体教程 https://phpforumer.com/topic/17/ 繁體教學 https://phpforumer.com/topic/18/ 論壇後端 -> 系統 -> 搜尋引擎最佳化 -> 偽靜態網址? -> [v] 是 -> 確認 以下省略 ..... 論壇後端 -> 系統 -> 進階配置 -> 友善網址 -> 以下省略 .....
-
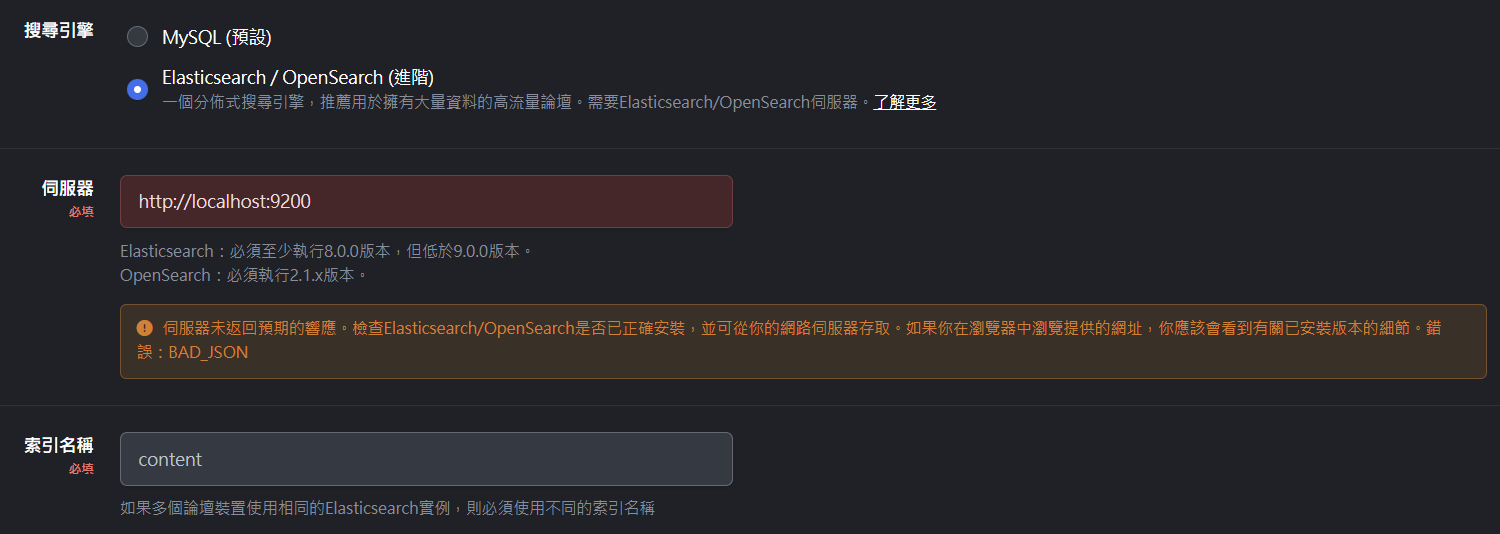
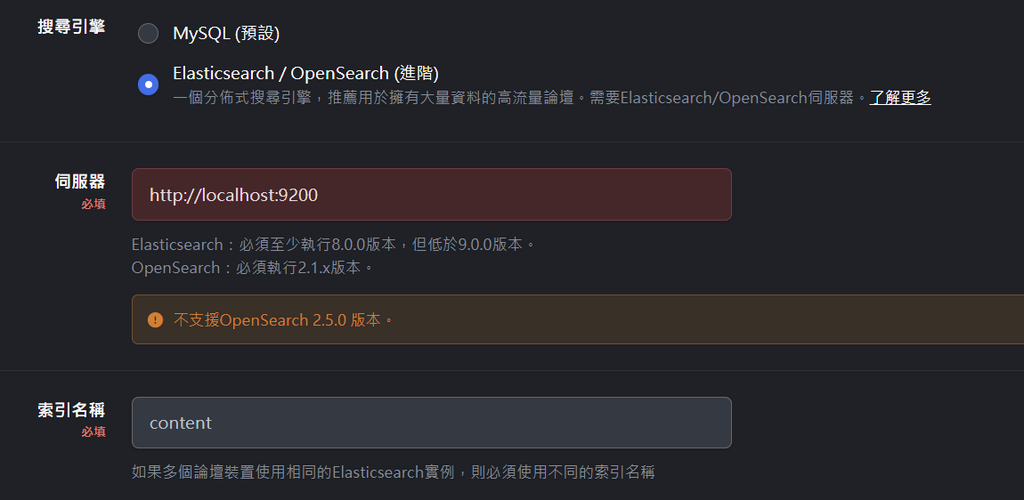
到IPS論壇後端設置Elasticsearch / OpenSearch,才能中文搜尋 前面步驟已安裝 Elasticsearch / OpenSearch 如果有問題,在此會顯示錯誤訊息 ------------------------------------------------------------------ 到IPS論壇後端設置Elasticsearch / OpenSearch,才能中文搜尋 ------------------------------------------------------------------ 論壇後端 -> 系統 -> 搜尋 搜尋引擎 -> Elasticsearch / OpenSearch (進階) 伺服器 -> http://localhost:9200 索引名稱 -> content 如果你有多個論壇,則必須使用不同的索引名稱 分析器 -> 中文/日文/韓文 -> 儲存 論壇後端 -> 系統 -> 搜尋 -> 右上方的 "重建搜尋索引" 按下去 回到儀表板,最好是按下按鈕,手動重建搜尋索引,加快速度完成它

-
安裝 OpenSearch 2.5.0 搜尋中文 (論壇不支援此版本) 由於Debian簡易安裝需要 .deb 安裝檔,而OpenSearch官網要等到 OpenSearch 2.5.0版本才有出 .deb 安裝檔 所以下面教學內容無法使用在Invision Community論壇 雖然我試過 .rpm 轉換為 .deb,是可以轉換檔案,但是安裝後有錯誤訊息,無法使用 ------------------------------------------------------------ 安裝套件、依賴包 ------------------------------------------------------------ 安裝java apt install -y default-jdk 顯示已安裝 openjdk version "17.0.14" 2025-01-21 java -version ------------------------------------------------------------ 安裝 OpenSearch ------------------------------------------------------------ OpenSearch 舊版本 https://opensearch.org/lines/2x.html IPS論壇後端有寫到,必須執行OpenSearch 2.1.x 版本 下載 wget https://artifacts.opensearch.org/releases/bundle/opensearch/2.5.0/opensearch-2.5.0-linux-x64.deb 安裝 dpkg -i opensearch-2.5.0-linux-x64.deb systemctl daemon-reload systemctl enable opensearch.service systemctl start opensearch.service systemctl status opensearch.service 按 Ctrl + z 結束 --------------------------------------- 查詢RAM占用情況 --------------------------------------- free -h VPS 2C/2G RAM Mem: 1.7G used --------------------------------------- 修改 opensearch.yml --------------------------------------- vi /etc/opensearch/opensearch.yml #network.host: 192.168.0.1 修改為 network.host: 127.0.0.1 #http.port: 9200 修改為 http.port: 9200 額外加入底下這幾行 # If you previously disabled the Security plugin in opensearch.yml, # be sure to re-enable it. Otherwise you can skip this setting. plugins.security.disabled: true ESC儲存並離開 :wq --------------------------------------- jvm.options --------------------------------------- vi /etc/opensearch/jvm.options 搜尋 -Xms1g -Xmx1g 將這兩個1g調低,因為只是小論壇用量不大,就越低越好 -Xms256m -Xmx256m ESC儲存並離開 :wq --------------------------------------- 啟動 --------------------------------------- 啟動 systemctl start opensearch.service 瀏覽狀態 service opensearch status 測試 OpenSearch 是否安裝成功 curl http://127.0.0.1:9200 結果返回 curl: (52) Empty reply from server 重開機 reboot 再測一次,測試是否有執行 service opensearch status 按 Ctrl + z 結束 curl http://127.0.0.1:9200 返回訊息 "The OpenSearch Project: https://opensearch.org/" OpenSearch有在運行了 --------------------------------------- 查詢RAM占用情況 --------------------------------------- free -h VPS 2C/2G RAM Mem: 1.1G used --------------------------------------- 移除opensearch --------------------------------------- dpkg -r opensearch 重開機 reboot 回到上面的教學,再次安裝opensearch其他版本
-
Cron每分鐘執行論壇任務、每天自動備份DB資料庫、每天自動備份Web網站檔案 ------------------------------------ Cron每分鐘執行論壇任務 ------------------------------------ 開機啟用 systemctl enable cron 啟動 systemctl start cron 瀏覽crontab定時任務執行 crontab -l 將IPS論壇的 task.php 權限修改為755 chmod 0755 /var/www/域名.com/applications/core/interface/task/task.php 到IPS論壇後端 -> 系統 -> 進階配置 -> (v) 使用Cron (推薦) -> 儲存 你應該將Cron設定為每分鐘執行以下命令: /usr/bin/php -d memory_limit=-1 -d max_execution_time=0 /var/www/域名.com/applications/core/interface/task/task.php 數值 將上面那行Cron改為每1分鐘執行IPS論壇任務 */1 * * * * /usr/bin/php -d memory_limit=-1 -d max_execution_time=0 /var/www/域名.com/applications/core/interface/task/task.php 數值 開啟crontab,將上面那行 xxxx ....task.php 數值 複製貼上到最底下 (第1行是 acme.sh 自動續簽SSL憑證) crontab -e ESC儲存並離開 :wq 瀏覽crontab定時任務執行列表 crontab -l ------------------------------------ 備份資料庫、備份Web目錄 ------------------------------------ 下載備份腳本 backup.sh ----------------------- 修改為你的論壇情況 ----------------------- vi /root/backup.sh Backup_Home="/var/www/backup/" MySQL_Dump="/usr/bin/mysqldump" ######~Set Directory you want to backup~###### Backup_Dir=("/var/www/域名.com") ######~Set MySQL Database you want to backup~###### Backup_Database=("資料庫名") ######~Set MySQL UserName and password~###### MYSQL_UserName='root' MYSQL_PassWord='資料庫root的密碼' ESC儲存並離開 :wq SFTP將backup.sh腳本 上傳到 /root/ 目錄 ------------------------------------ 將 backup.sh 更改為可執行權限 ------------------------------------ chmod +x /root/backup.sh --------------------------------------------- 每日3點,備份資料庫、備份網站目錄 --------------------------------------------- crontab -e 每日3點執行,備份資料庫、備份網站目錄,也是加入到底下 0 3 * * * bash /root/backup.sh ESC儲存並離開 :wq crontab修改後不需要restart 瀏覽crontab定時任務執行列表 crontab -l ------------------------------------------------- 建立備份檔的儲存目錄 /var/www/backup ------------------------------------------------- 建立 /var/www/backup 目錄,之後資料庫、網站目錄的備份檔放在這裡 mkdir /var/www/backup 測試備份資料庫、備份網站目錄的腳本 bash /root/backup.sh 正確的話,你將看到 Backup website files... Backup Databases... Delete old backup files... 進入備份的目錄 cd /var/www/backup ls -l 也用SFTP進入 /var/www/backup 備份目錄看看 backup.sh
-
恢復論壇DB資料庫、恢復論壇WWW網站檔案 ---------------------- 將Nginx停止 ---------------------- 避免恢復網站期間,發生網站備份檔外洩 將Nginx停止 /etc/init.d/nginx stop --------------------------- 恢復資料庫 --------------------------- SFTP將資料庫檔案上傳到 /usr/bin/ cd /usr/bin 解壓縮,得到資料庫檔案 unzip -o DB.zip --------------------------------------------------------- 恢復資料庫 --------------------------------------------------------- cd /usr/bin mysql -u 使用者名 -p --default-character-set=utf8mb4 資料庫名 < 備份檔名.sql mysql -u root -p --default-character-set=utf8mb4 xxxxxx_com < DB.sql Enter password: 輸入資料庫使用者名的密碼 開始恢復資料庫,隨著你的資料庫越大,恢復時間也就越久 ------------------------------- 刪除資料庫的備份檔 ------------------------------- cd /usr/bin/ 刪除資料庫備份檔 rm DB.zip rm DB.sql -------------------------------------- phpMyAdmin做資料維護 -------------------------------------- 進入phpMyAdmin http://伺服器IP:888/phpmyadmin/ 瀏覽論壇資料庫的 編碼與排序 是否為 utf8mb4_general_ci 或 utf8mb4_unicode_ci 到論壇資料庫 -> 資料表底部 -> 全選 -> 依次使用 檢查資料表 最佳化資料表 注意:頁碼可能有 2頁 或更多 -------------------------- 恢復WWW論壇網站檔案 -------------------------- SFTP上傳 網站備份檔 web.zip cd /var/www cd /var/www/域名.com 解壓縮 網站備份檔 unzip -o web.zip 更改網站目錄與檔案的擁有人/群組 chown -R www-data:www-data /var/www/域名.com 確認是否都改為 www-data www-data ls -l 修改 conf_global.php 裡的資料庫名、資料庫用戶、資料庫用戶密碼 vi /var/www/域名.com/conf_global.php 'sql_database' => '資料庫名稱', 'sql_user' => '資料庫用戶', 'sql_pass' => '用戶密碼', ESC儲存並離開 :wq 刪除網站備份檔 web.zip rm web.zip --------------------------- 將Nginx啟動 --------------------------- 將Nginx啟動 /etc/init.d/nginx start ----------------------- 回到論壇 ----------------------- 此時,論壇可以連入 https://域名.com/ 後續從這個步驟開始做 Cron每分鐘執行論壇任務、每天自動備份DB資料庫、自動備份WWW網站檔案
-
上傳IPS論壇程式、解壓縮、網站目錄 www-data www-data --------------------------------------------------- 上傳IPS論壇程式、解壓縮 --------------------------------------------------- 停止Nginx /etc/init.d/nginx stop SFTP上傳論壇程式到根目錄 cd /var/www/域名.com 解壓縮 unzip -o ips.zip ----------------------------------------------------- 更改網站的 擁有人/群組 為 www-data www-data ----------------------------------------------------- IPS論壇解壓縮之後,會看到 擁有人/群組 是 root root ls -l 更改網站目錄與檔案的擁有人/群組 chown -R www-data:www-data /var/www/域名.com cd /var/www/域名.com 可看到 擁有人/群組 已改為 www-data www-data ls -l 啟動Nginx /etc/init.d/nginx start
-
413 Request Entity Too Large 這是因為nginx.conf未配置好 ------------------------------------- 413 Request Entity Too Large ------------------------------------- 這是因為 nginx.conf 未配置好 vi /etc/nginx/nginx.conf user www-data; worker_processes auto; worker_cpu_affinity auto; pid /run/nginx.pid; include /etc/nginx/modules-enabled/*.conf; #Specifies the value for maximum file descriptors that can be opened by this process. worker_rlimit_nofile 51200; events { use epoll; worker_connections 51200; multi_accept off; accept_mutex off; } http { sendfile on; tcp_nopush on; types_hash_max_size 2048; server_tokens off; access_log off; server_names_hash_bucket_size 128; client_header_buffer_size 32k; large_client_header_buffers 4 32k; client_max_body_size 200m; sendfile_max_chunk 512k; keepalive_timeout 60; tcp_nodelay on; # server_name_in_redirect off; fastcgi_connect_timeout 300; fastcgi_send_timeout 300; fastcgi_read_timeout 300; fastcgi_buffer_size 64k; fastcgi_buffers 4 64k; fastcgi_busy_buffers_size 128k; fastcgi_temp_file_write_size 256k; gzip on; gzip_min_length 1k; gzip_buffers 4 16k; gzip_http_version 1.1; gzip_comp_level 2; gzip_types text/plain application/javascript application/x-javascript text/javascript text/css application/xml application/xml+rss; gzip_vary on; gzip_proxied expired no-cache no-store private auth; gzip_disable "MSIE [1-6]\."; include /etc/nginx/mime.types; default_type application/octet-stream; ## # SSL Settings ## ssl_protocols TLSv1 TLSv1.1 TLSv1.2 TLSv1.3; # Dropping SSLv3, ref: POODLE ssl_prefer_server_ciphers on; ## # Logging Settings ## access_log /var/log/nginx/access.log; error_log /var/log/nginx/error.log; ## # Virtual Host Configs ## include /etc/nginx/conf.d/*.conf; include /etc/nginx/sites-enabled/*; } #mail { # # See sample authentication script at: # # http://wiki.nginx.org/ImapAuthenticateWithApachePhpScript # # # auth_http localhost/auth.php; # # pop3_capabilities "TOP" "USER"; # # imap_capabilities "IMAP4rev1" "UIDPLUS"; # # server { # listen localhost:110; # protocol pop3; # proxy on; # } # # server { # listen localhost:143; # protocol imap; # proxy on; # } #} ESC儲存並離開 :wq 重啟Nginx /etc/init.d/nginx restart 重新載入Nginx nginx -t nginx -s reload
-
各種論壇的偽靜態 --------------------- 各種論壇的偽靜態 --------------------- 建立偽靜態 rewrite 存放的目錄 mkdir -p /etc/nginx/rewrite 寫入各種論壇的偽靜態.conf vi /etc/nginx/rewrite/各種論壇的偽靜態.conf 寫入論壇的偽靜態 ESC儲存並離開 :wq 接下來,也需要修改 域名.com.conf vi /etc/nginx/sites-available/域名.com.conf 我放在這一行 include rewrite/ips.conf; 也就是修改為 include rewrite/各種論壇的偽靜態.conf; ESC儲存並離開 :wq --------------------------- IPS論壇的偽靜態 --------------------------- vi /etc/nginx/rewrite/ips.conf location / { try_files $uri $uri/ /index.php; } location ~^(/page/).*(.php)$ { try_files $uri $uri/ /index.php; } location /api/ { if (!-e $request_filename){ rewrite ^/api/(.*)$ /api/index.php; } } ESC儲存並離開 :wq ------------------ 重新載入Nginx ------------------ 重新載入Nginx nginx -t nginx -s reload 有嚴重錯誤,將提示訊息 如果成功,則是以下的訊息 nginx: the configuration file /etc/nginx/nginx.conf syntax is ok nginx: configuration file /etc/nginx/nginx.conf test is successful
-
設置Cron,自動續簽SSL --------------------------- 設置Cron,自動續簽SSL --------------------------- 開機啟用 systemctl enable cron 啟動cron systemctl start cron 瀏覽crontab定時任務運行列表 crontab -l 原來安裝acme.sh時,已自動寫入到crontab 25 19 * * * "/root/.acme.sh"/acme.sh --cron --home "/root/.acme.sh" > /dev/null 開啟crontab crontab -e 將出現訊息 Select an editor. To change later, run 'select-editor'. 1. /bin/nano <---- easiest 2. /usr/bin/vim.basic 3. /usr/bin/vim.tiny 我慣用vi,所以按 2 ESC 不修改就離開 :q 重開機 reboot
-
修改Nginx的 域名.com.conf、上傳ca.cer、修改偽靜態 rewrite -------------------------- 修改 域名.com.conf -------------------------- vi /etc/nginx/sites-available/域名.com.conf server { listen 443 ssl default_server; listen [::]:443 ssl default_server; http2 on; server_name 域名.com; root /var/www/域名.com; index index.html index.htm index.php default.html default.htm default.php; ssl_certificate /etc/nginx/ssl/fullchain.cer; ssl_certificate_key /etc/nginx/ssl/域名.com.key; ssl_trusted_certificate /etc/nginx/ssl/ca.cer; ssl_session_timeout 1d; ssl_session_cache shared:MozSSL:10m; ssl_session_tickets off; ssl_protocols TLSv1.3; ssl_prefer_server_ciphers off; ssl_ciphers "TLS13-AES-256-GCM-SHA384:TLS13-CHACHA20-POLY1305-SHA256:TLS13-AES-128-GCM-SHA256:TLS13-AES-128-CCM-8-SHA256:TLS13-AES-128-CCM-SHA256:EECDH+CHACHA20:EECDH+CHACHA20-draft:EECDH+AES128:RSA+AES128:EECDH+AES256:RSA+AES256:EECDH+3DES:RSA+3DES:!MD5"; ssl_stapling on; ssl_stapling_verify on; include rewrite/ips.conf; resolver 1.1.1.1 8.8.8.8 valid=300s; resolver_timeout 10s; add_header Alt-Svc 'h3=":443"; ma=86400'; add_header QUIC-Status $http3; add_header Strict-Transport-Security "max-age=31536000; includeSubDomains; preload"; add_header Content-Security-Policy-Report-Only "default-src https:; script-src https: 'unsafe-eval' 'unsafe-inline'; style-src https: 'unsafe-inline'; img-src https: data:; font-src https: data:"; add_header X-Frame-Options "SAMEORIGIN"; location ~ \.php$ { include snippets/fastcgi-php.conf; fastcgi_pass unix:/var/run/php/php8.3-fpm.sock; fastcgi_param SCRIPT_FILENAME $document_root$fastcgi_script_name; include fastcgi_params; } brotli on; brotli_types text/css text/x-component application/x-javascript application/javascript text/javascript text/x-js text/richtext image/svg+xml text/plain text/xsd text/xsl text/xml image/x-icon application/octet-stream; gzip on; gzip_types text/css text/x-component application/x-javascript application/javascript text/javascript text/x-js text/richtext image/svg+xml text/plain text/xsd text/xsl text/xml image/x-icon application/octet-stream; location ~ .*\.(gif|jpg|jpeg|png|bmp|swf)$ { expires 30d; } location ~ .*\.(js|css)?$ { expires 12h; } location ~ /.well-known { allow all; } location ~ /\. { deny all; } } ESC儲存並離開 :wq --------------------------------------------- 下載 ca.cer 並上傳到 /etc/nginx/ssl/ 目錄 --------------------------------------------- 在 /root/.acme.sh/域名.com_ecc 目錄,下載 ca.cer 再將 ca.cer 上傳到 /etc/nginx/ssl/ 目錄 -------------------------- 偽靜態 rewrite -------------------------- 建立偽靜態 rewrite 存放的目錄 mkdir -p /etc/nginx/rewrite 寫入ips論壇的偽靜態 vi /etc/nginx/rewrite/ips.conf location / { try_files $uri $uri/ /index.php; } location ~^(/page/).*(.php)$ { try_files $uri $uri/ /index.php; } location /api/ { if (!-e $request_filename){ rewrite ^/api/(.*)$ /api/index.php; } } ESC儲存並離開 :wq ------------------ 重新載入Nginx ------------------ 重新載入Nginx nginx -t nginx -s reload 開啟瀏覽器,現在可進入網站了 https://域名.com/
-
安裝 acme.sh 來做 自動續簽SSL憑證 --------------------------------------- 安裝 acme.sh 來做 自動續簽SSL憑證 --------------------------------------- mkdir -p /var/www/域名.com/well-known mkdir -p /var/www/域名.com/well-known/acme-challenge cd /var/www/域名.com/ mv well-known .well-known 產生dhparam mkdir -p /etc/nginx/ssl openssl dhparam -dsaparam -out /etc/nginx/ssl/dhparam 2048 ------------------------------------- acme.sh 預設安裝在/root/ 目錄 ------------------------------------- curl https://get.acme.sh | sh -s email=你的email 重新載入 source ~/.bashrc 自動更新 acme.sh --upgrade --auto-upgrade 切換為使用Let's Encrypt acme.sh --set-default-ca --server letsencrypt 修改 域名.com.conf vi /etc/nginx/sites-available/域名.com.conf 前面步驟有寫了幾行,現在都刪掉,更換為 server { listen 80; listen [::]:80; root /var/www/域名.com; index index.html index.htm index.php; server_name 域名.com; location /.well-known/acme-challenge { root /var/www/letsencrypt; } location / { rewrite ^/(.*)$ https://$host/$1 permanent; } } ESC儲存並離開 :wq 重新載入Nginx nginx -t nginx -s reload mkdir -p /var/www/letsencrypt 使用HTTP驗證簽發憑證 如果要申請多個域名,則是執行 acme.sh --issue -d 域名.com -d www.域名.com -w /var/www/letsencrypt 等待執行完,直到出現 Cert success Your cert is in: /root/.acme.sh/域名.com_ecc/域名.com.cer Your cert key is in: /root/.acme.sh/域名.com_ecc/域名.com.key The intermediate CA cert is in: /root/.acme.sh/域名.com_ecc/ca.cer And the full chain certs is there: /root/.acme.sh/域名.com_ecc/fullchain.cer 從上面得知,這是ECC憑證 安裝ECC憑證 acme.sh --install-cert --ecc -d 域名.com \ 依次敲入 --key-file /etc/nginx/ssl/域名.com.key \ --fullchain-file /etc/nginx/ssl/fullchain.cer \ --reloadcmd "systemctl restart nginx" 成功的話,將顯示 Run reload cmd: systemctl restart nginx 成功的話,將顯示 Reload success
-
phpMyAdmin建立新的資料庫用戶名、資料庫用戶密碼、資料庫名 ---------------------------------------------------------------------- phpMyAdmin建立新的資料庫用戶名、資料庫用戶密碼 ---------------------------------------------------------------------- phpMyAdmin首頁 -> 使用者帳號 -> 新增使用者帳號 通常是建立 域名_com ,但不能用中文字 使用者名稱:xxxx_com 主機名稱:localhost 密碼:請使用底下的產生密碼 -> 按 產生,將產生隨機密碼 全域權限 -> v 全選 -> 執行 ---------------------------------------------------------------------- phpMyAdmin建立資料庫名 ---------------------------------------------------------------------- phpMyAdmin首頁 -> 上方的資料庫選項 -> 建立新資料庫 -> 資料庫名 通常也是資料庫用戶名 xxxx_com 編碼與排序 -> 選擇 utf8mb4_general_ci -> 建立 ---------------------------------------------------------------------- 資料庫用戶名、資料庫用戶密碼、資料庫名 ---------------------------------------------------------------------- 資料庫用戶名 -> xxxx_com 資料庫用戶密碼 -> 自動產生的隨機密碼 資料庫名 -> xxxx_com
-
安裝phpMyAdmin、修改為 888 port、使用IP當phpMyAdmin的網址來管理資料庫 ---------------------------- 安裝phpMyAdmin ---------------------------- IP的網站目錄 /var/www/html/ 修改 vi /etc/nginx/sites-available/default 搜尋 index index.html index.htm index.nginx-debian.html; 修改為 index index.html index.htm index.php; ESC儲存並離開 :wq 先到phpMyAdmin官網,最新版本是多少,例如 phpMyAdmin 5.2.2 https://www.phpmyadmin.net/ cd /root wget -P Downloads https://files.phpmyadmin.net/phpmyadmin.keyring wget -P Downloads https://files.phpmyadmin.net/phpMyAdmin/5.2.2/phpMyAdmin-5.2.2-all-languages.tar.gz cd Downloads gpg --import phpmyadmin.keyring wget https://files.phpmyadmin.net/phpMyAdmin/5.2.2/phpMyAdmin-5.2.2-all-languages.tar.gz.asc gpg --verify phpMyAdmin-5.2.2-all-languages.tar.gz.asc mkdir /var/www/html/phpMyAdmin tar xvf phpMyAdmin-5.2.2-all-languages.tar.gz --strip-components=1 -C /var/www/html/phpMyAdmin cp /var/www/html/phpMyAdmin/config.sample.inc.php /var/www/html/phpMyAdmin/config.inc.php vi /var/www/html/phpMyAdmin/config.inc.php 搜尋 $cfg['blowfish_secret'] = ''; 修改為 $cfg['blowfish_secret'] = 'DOFw4356A65IScA&Q!cDugr!lSfuBz*A'; ESC儲存並離開 :wq chmod 660 /var/www/html/phpMyAdmin/config.inc.php chown -R www-data:www-data /var/www/html/phpMyAdmin 重新加载Nginx nginx -t nginx -s reload 修改 vi /etc/nginx/sites-available/default 搜尋這代碼 location / { # First attempt to serve request as file, then # as directory, then fall back to displaying a 404. try_files $uri $uri/ =404; } 然後,在這段代碼的底下,加入 location ~ \.php$ { include snippets/fastcgi-php.conf; fastcgi_pass unix:/var/run/php/php8.3-fpm.sock; } ESC儲存並離開 :wq 重新加载Nginx nginx -t nginx -s reload 現在瀏覽器可以進入phpMyAdmin (此時 http 是用 80 port) http://你的IP/phpMyAdmin --------------------------------- phpMyAdmin改為 888 port --------------------------------- 我慣用伺服器IP當作phpMyAdmin的網址,並改為 888 port,利用防火牆擋住全部IP連入,限自己的IP才能連入phpMyAdmin 預設網站目錄 /var/www/html/phpMyAdmin/ 修改為 888 port vi /etc/nginx/sites-available/default 搜尋 listen 80 default_server; 修改為 listen 888 default_server; 下面那一行,使用 # 註解掉 #listen [::]:80 default_server; ESC儲存並離開 :wq 重新加载Nginx nginx -t nginx -s reload 重開機 reboot phpMyAdmin 已改為 888 port 然後雲主機的WAF防火牆、iptables防火牆,也要修改 888 port 只允許自己的IP才可以連入 這時,防火牆都修改完畢,瀏覽器進入你的伺服器IP http://你的伺服器IP:888/phpMyAdmin/ 出現訊息 尚未設定 phpMyAdmin 設定儲存空間,部份延伸功能將無法使用。 你需要下載 https://www.phpmyadmin.net/downloads/phpMyAdmin-latest-all-languages.tar.gz 解壓縮 phpMyAdmin-latest-all-languages.tar.gz 尋找目錄中 /sql/create_tables.sql 找到 create_tables.sql 返回瀏覽器 phpMyAdmin -> 匯入 -> 要匯入的檔案 -> 選擇檔案 -> create_tables.sql -> 匯入 返回phpMyAdmin首頁 尚未設定 phpMyAdmin 設定儲存空間,部份延伸功能將無法使用。-----> 已經沒有出現這一條訊息
-
安裝Nginx、更改主機名 --------------- 安裝Nginx --------------- apt update apt upgrade -y apt dist-upgrade -y apt install zip unzip apt install curl vim wget gnupg dpkg apt-transport-https lsb-release ca-certificates 增加 https://n.wtf GPG Key curl -sSL https://n.wtf/public.key | gpg --dearmor > /usr/share/keyrings/n.wtf.gpg 加入 https://n.wtf/ 的Nginx源 echo "deb [arch=$(dpkg --print-architecture) signed-by=/usr/share/keyrings/n.wtf.gpg] https://mirror-cdn.xtom.com/sb/nginx/ $(lsb_release -sc) main" > /etc/apt/sources.list.d/n.wtf.list 更新 apt update 安裝nginx apt install nginx-extras -y 瀏覽nginx版本,顯示 nginx version: nginx-n.wtf/1.27.4 nginx -V ---------------------------- 更改主機名 ---------------------------- 更改主機名 hostnamectl set-hostname 域名.com 重開機 reboot SSH登入,將顯示 Linux 你的域名.com 6.1.0-32-amd64 #1 SMP PREEMPT_DYNAMIC Debian 6.1.129-1 (2025-03-06) x86_64 ---------------------------- 配置Nginx ---------------------------- 預設網站目錄 mkdir -p /var/www/域名.com 新增 域名.com.conf vi /etc/nginx/sites-available/域名.com.conf ---------------------------------------------- server { listen 80; root /var/www/域名.com; index index.html index.htm index.php; server_name 域名.com; location / { try_files $uri $uri/ =404; } } ---------------------------------------------- ESC儲存並離開 :wq 軟連結到 /etc/nginx/sites-enabled 目錄,讓它生效 ln -s /etc/nginx/sites-available/域名.com.conf /etc/nginx/sites-enabled/域名.com.conf 重新載入Nginx nginx -t nginx -s reload 在網站目錄中,新增一個index.html vi /var/www/域名.com/index.html 在此檔案中,複製貼上 Just test ESC儲存並離開 :wq ---------------------------------- 開機啟動 Nginx ---------------------------------- 開機啟動 systemctl enable nginx 啟動 systemctl start nginx 重開機 reboot 瀏覽nginx狀態 systemctl status nginx 按 ctrl + z 停止 這時,瀏覽器可進入你的網站 http://域名.com/